Geofences
For all your asset-tracking devices you can add a geofence to get alerts when a tracker enters or exits and area. You can create & edit geofences by going to your Overview dashboard and clicking on the pencil icon in the top left of the map.
Geofences Tool Overview
When you click the pencil icon to open the geofences tool you'll be greated with the following interface:
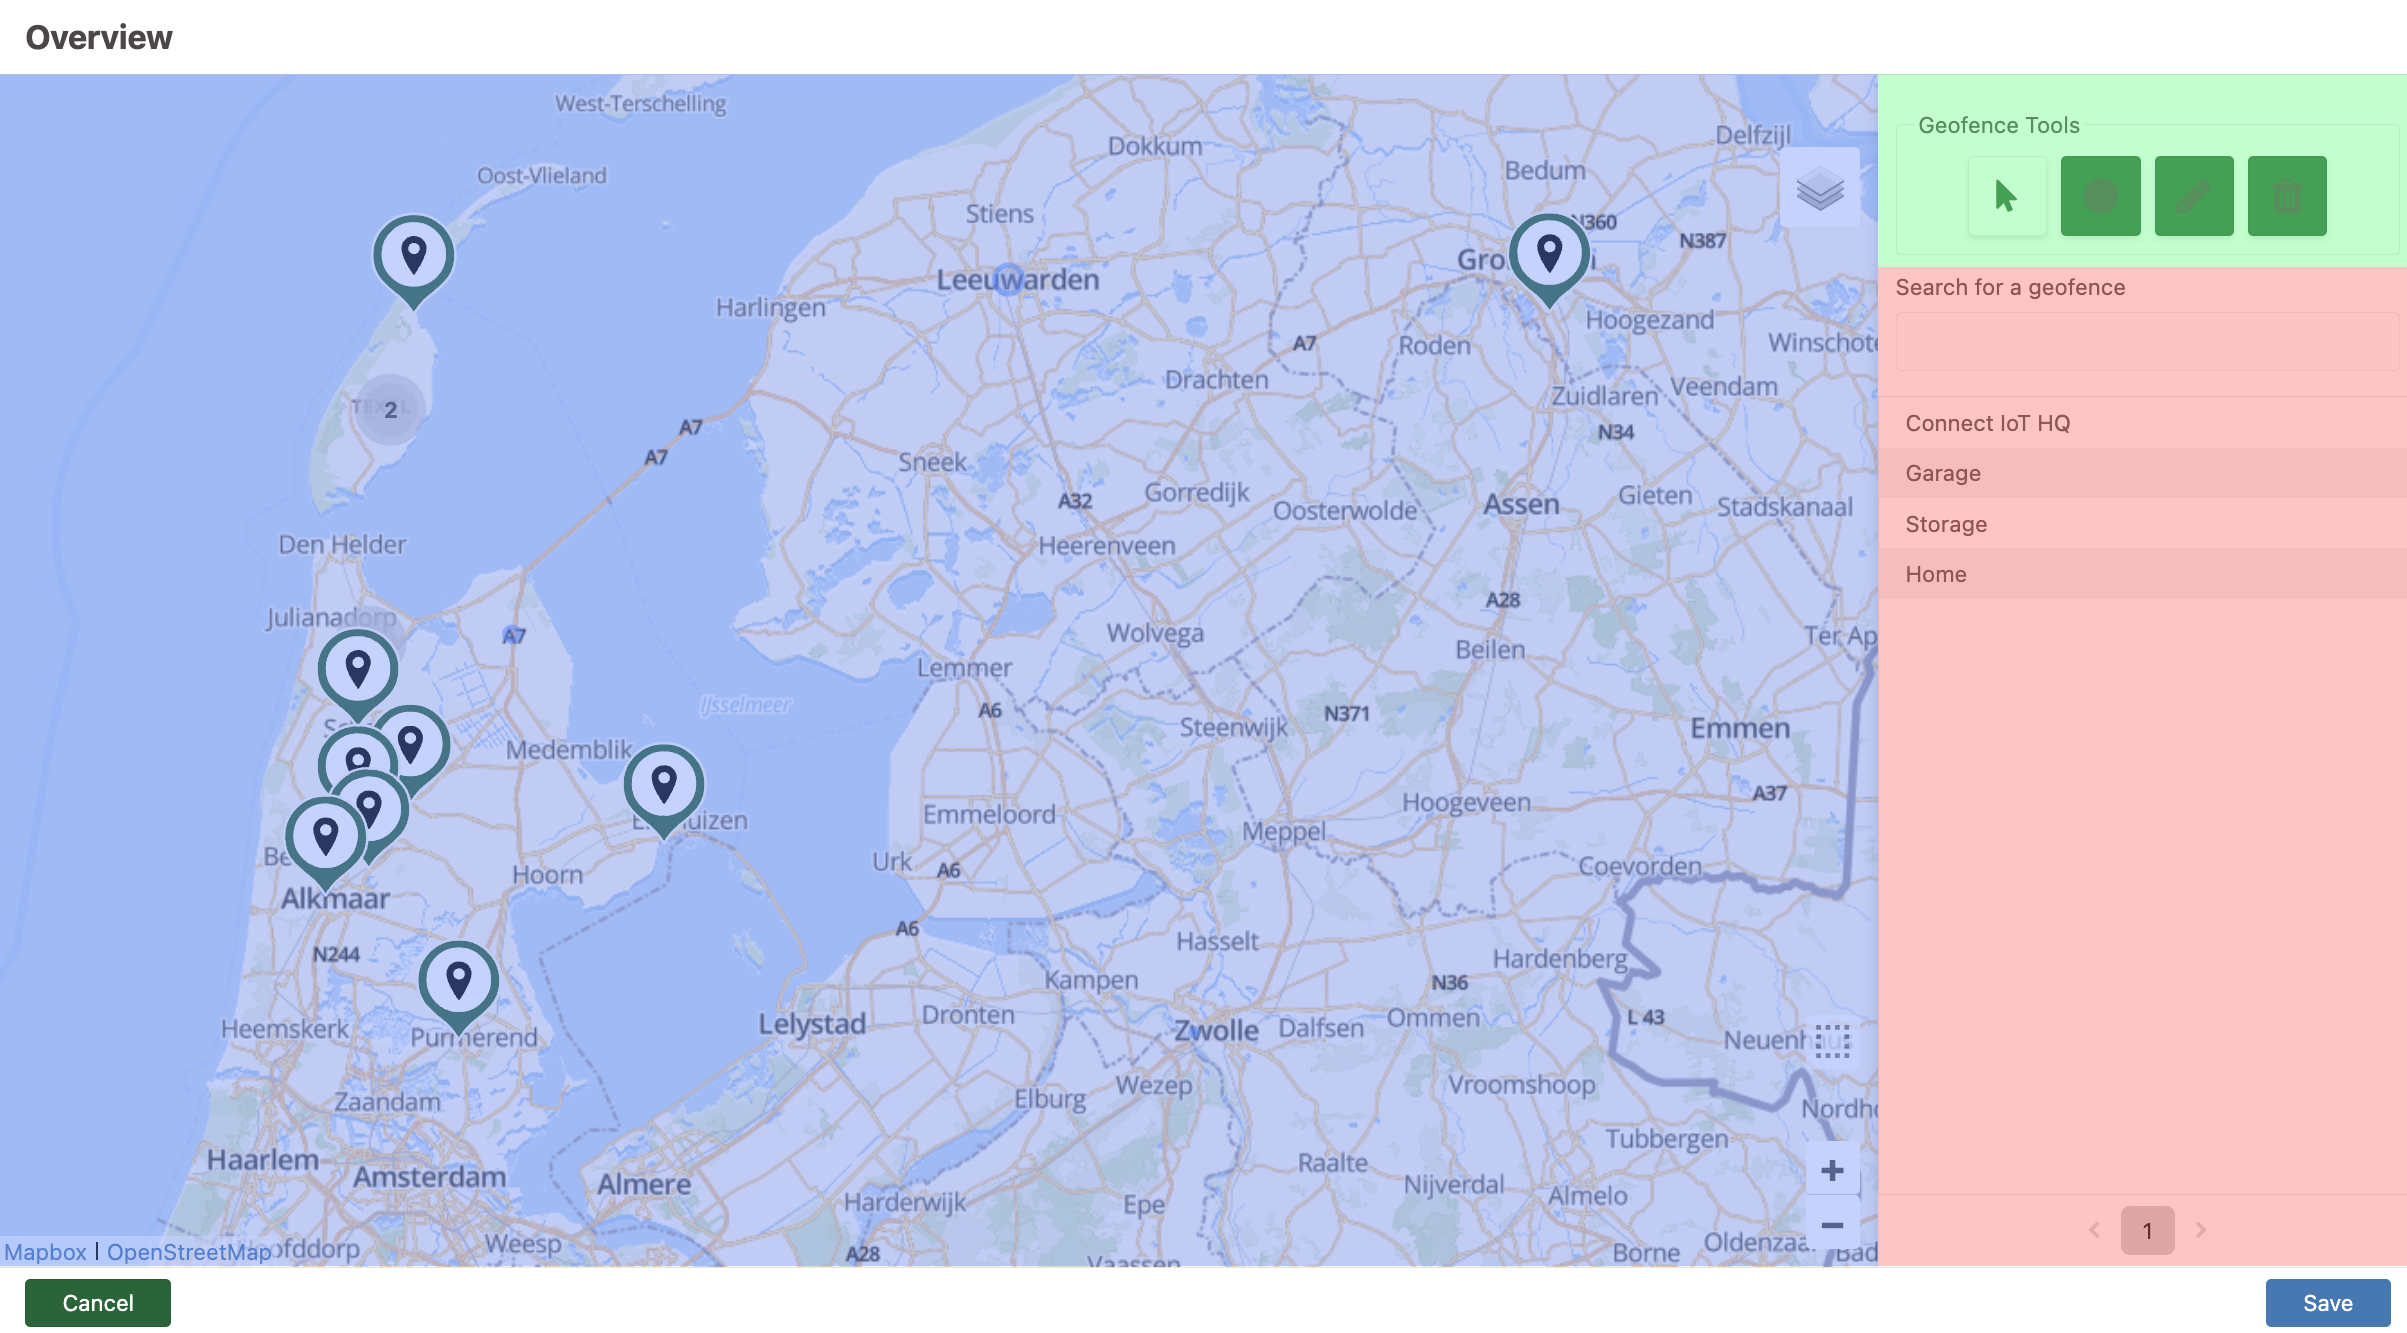
- Blue: Map showing trackers and geofences
- Green: Geofence tools to add, edit or delete geofences with
- Red: A list with all your currently saved geofences
Now let's add our first geofence and alert!
Adding a Geofence
- Open the geofences tool
- Go to the location on the map where you want to create a geofence
- Click the circle icon from the Geofence Tools to add a circular geofence
- Click, hold and drag to draw your circular geofence and release when you're satisfied
- Insert a name for the geofence in the Geofence name field
- Select the alert type from the Alert type dropdown
- Press Save
Editing an Existing Geofence
- Open the geofences tool
- In your geofence list click on the geofence you want to edit to automatically zoom to it
- Click the pencil icon from the Geofence Tools
- Two squares will appear; one in the middle and one at the edge of your geofence
- To move the geofence click, hold and drag the square in the middle of the geofence
- To resize the geofence click, hold and drag the square at the edge of the geofence
- Press Save to save your changes
Deleting a Geofence
- Open the geofences tool
- In your geofence list click on the geofence you want to delete to automatically zoom to it
- Click the bin icon from the Geofence Tools
- Click on the geofence's circle on the map to delete it
- Press Save
Great! You now know how to add, edit and delete geofences!